When you start a minivan camper build, one question comes up pretty quickly:
Do you keep the original carpet… or build a proper floor?
A lot of builds you see online keep the factory carpet to save weight. And yeah—that approach works.
But after going through my own build, I’m firmly in the “install a hard floor” camp.
Here’s why—and what it actually takes to do it right.
Why a Hard Floor Is Worth It
For me, this came down to daily usability.
A solid floor gives you:
- easy cleanup (dirt, mud, spills—no problem)
- better protection from moisture
- a cleaner, more finished look
- a solid base to mount cabinets safely
Yes, it adds some weight—but once you remove the rear seats, you’ve already offset a big chunk of that.
In real-world use, the benefits easily outweigh the trade-off.
Challenge #1: Nothing Is Straight
Minivans aren’t built with flat, square interiors.
So building the floor starts with:
- making a template
- test fitting
- adjusting (multiple times)
You’ll also need to plan cutouts—for things like:
- seat hardware
- spare tire access
It’s a bit of trial and error, but getting this right is key to everything else.
Challenge #2: Working Around Seat Hardware
The Toyota Sienna has sliding seat rails that are… not fun to remove.
Instead of going all-in, I:
- removed only what I could easily reinstall
- moved the remaining rails forward
- built the floor around them
This kept the build reversible, which was important to me.
Some extra cutouts were needed, but I reinforced those areas later so it didn’t compromise strength.
Challenge #3: The Floor Isn’t Level
This one surprised me.
The Sienna floor actually has a slight slope.
At first, it feels like a problem—but honestly:
- you can compensate with your bed design
- perfectly level parking is rare anyway
I also had to deal with uneven seat rails (outer vs inner height).
Fixing that was simple: I added support strips underneath the plywood to even things out.
Those rails now act like floor joists, supporting the whole structure.
Securing the Floor Properly
One thing I didn’t want: a floating floor.
I found mounting points hidden in the seat rail brackets and used them to:
- bolt the floor down securely
- add anchor points for cargo
This makes a big difference for safety—especially in a sudden stop.
Turning the Floor Into a Foundation
The floor isn’t just something you walk on—it’s the base of your entire build.
I added steel supports underneath to:
- reinforce weak areas
- create solid mounting points for cabinets
Everything—kitchen, storage, modules—ties into that structure.
That’s what makes the whole setup feel stable and solid while driving.
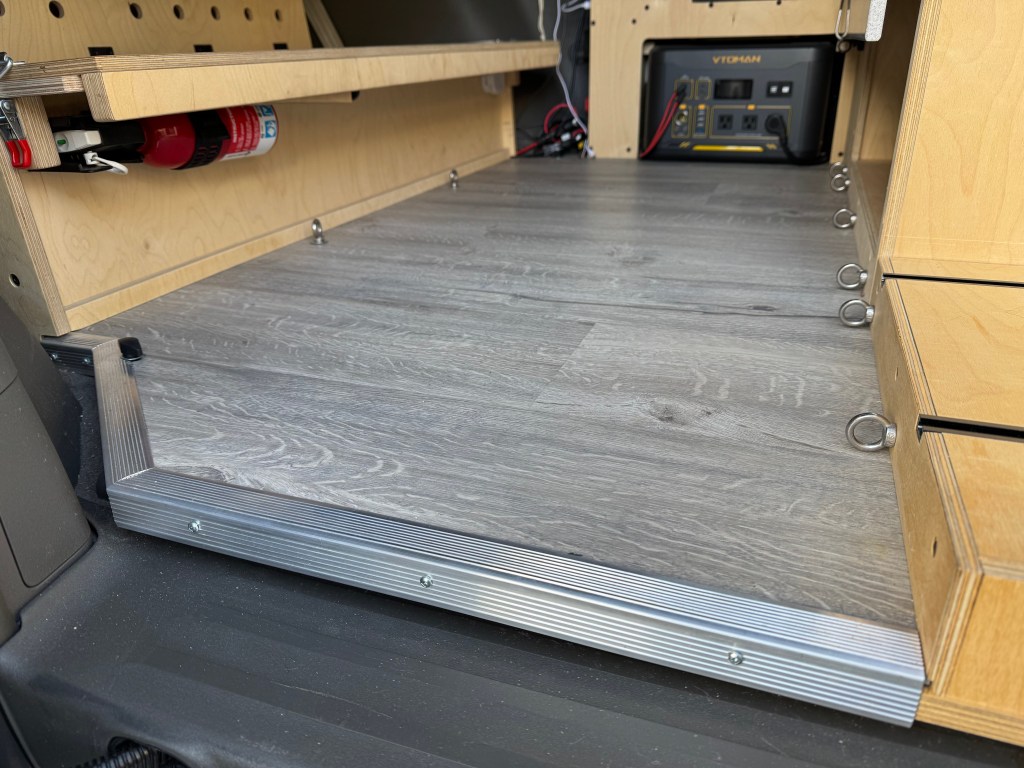
Why I Chose Vinyl on Top
For the top layer, I went with vinyl tiles.
Simple reasons:
- easy to clean
- durable
- removable if needed
I avoided gluing them down so the floor can handle temperature changes inside the van.
Just make sure to leave a small expansion gap around the edges—this matters more than you think.
Final Thoughts
Looking back, adding a proper floor was one of the best decisions in my build.
It:
- made the van easier to live in
- improved durability
- gave me a solid base for everything else
It’s not the lightest option—but it’s one of the most practical.
And in van life, practical usually wins.

Leave a comment