Many minivan conversions keep the original carpet to save weight. I went the other way: a rigid floor with an easy-to-clean surface is, in my opinion, a must-have. It keeps dirt, mud and moisture out of the carpet, it wipes clean, and it gives the whole build a solid foundation for cabinets. The extra weight is easier to accept when you’ve just removed five heavy seats. Here is a quick overview of how it came together in my Toyota Sienna.

The Challenges
Complex layout. Minivan walls aren’t straight, so I made a template, tested it, and only then cut the plywood. Expect a few rounds of trial and error, and leave some clearance so the floor doesn’t rub the walls.
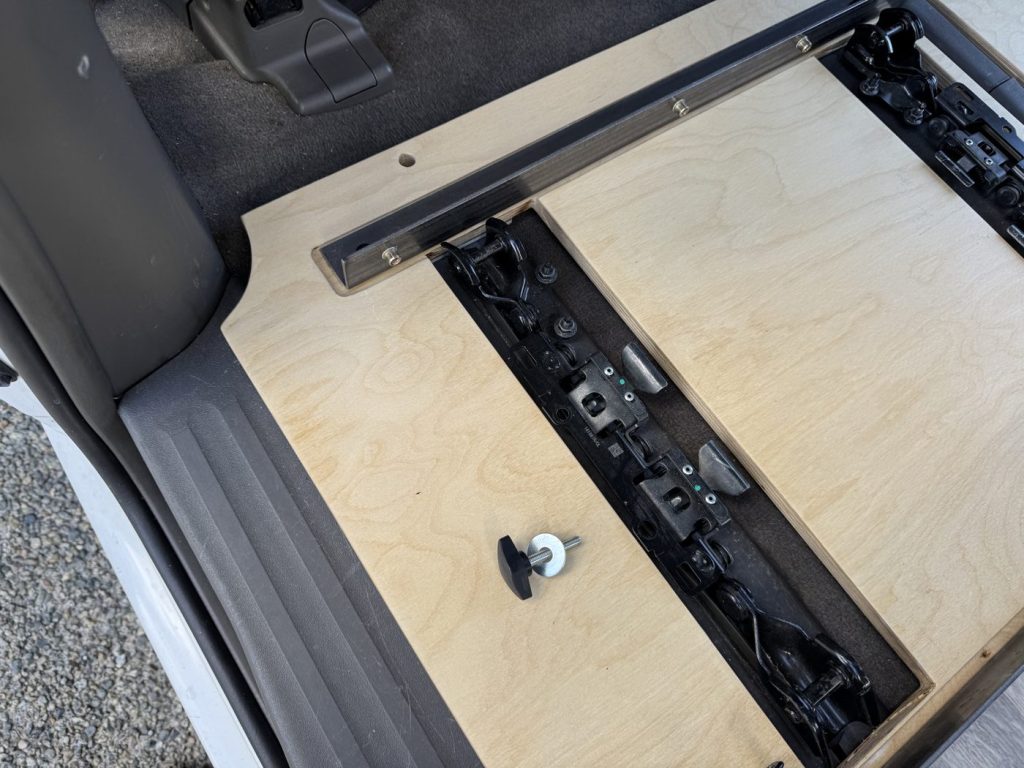
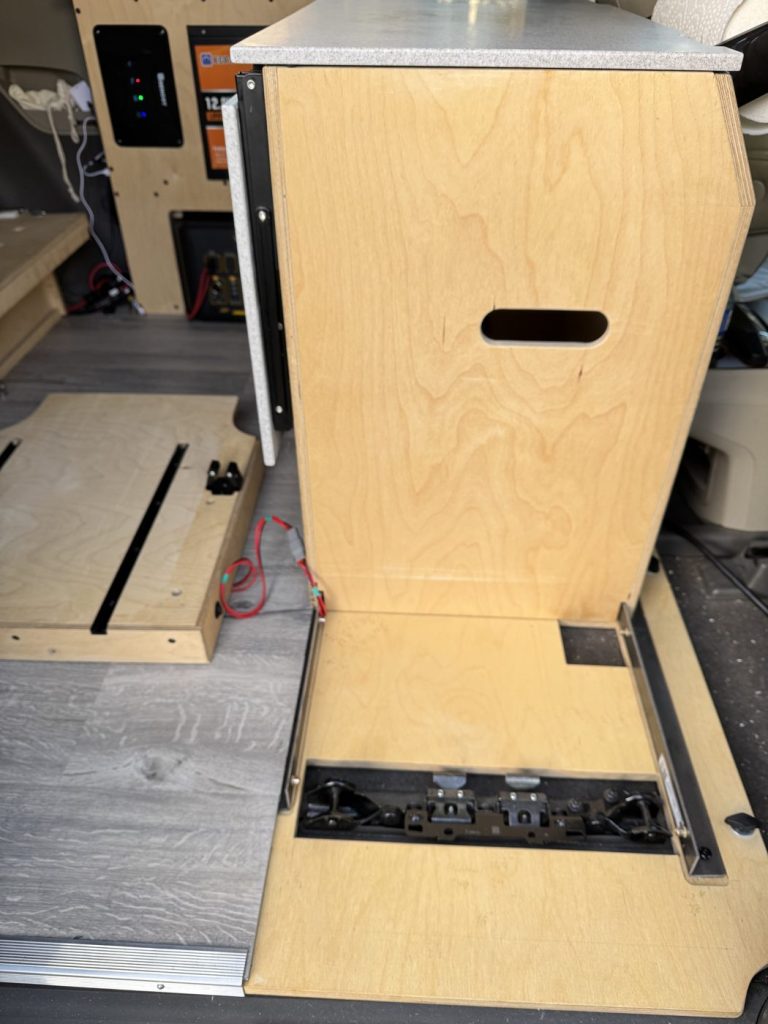
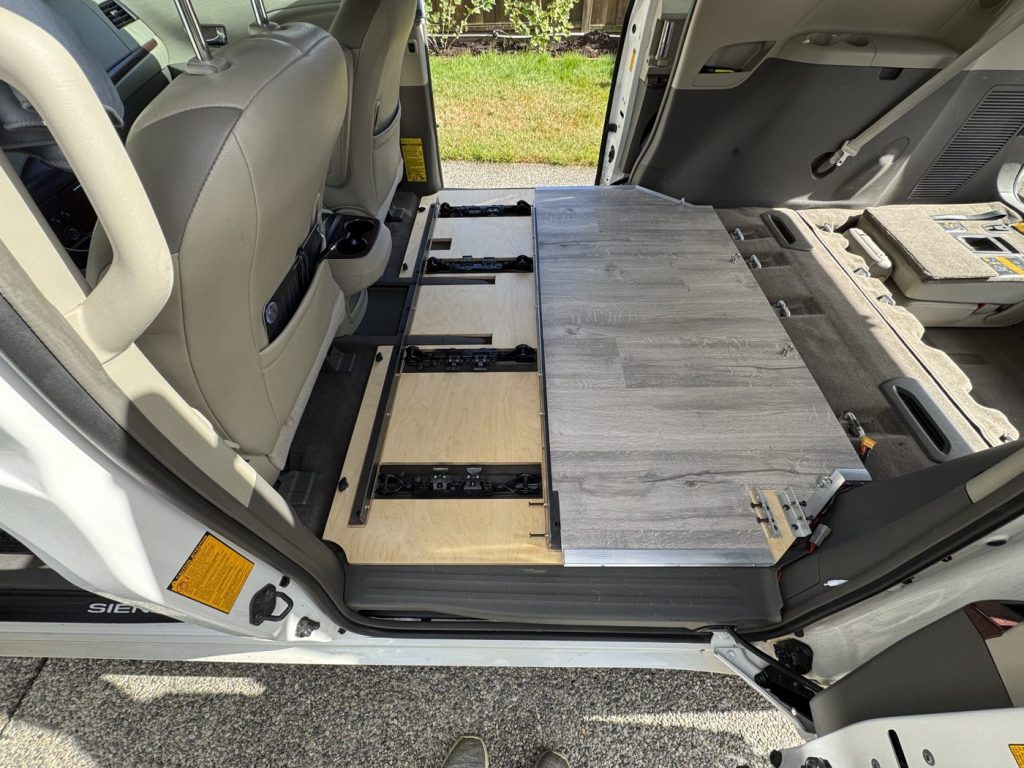
Seat hardware. The Sienna’s second-row seats sit on sliding trolleys that are very hard to remove. I removed only the plastic covers and the cross bar, slid the trolleys to the front (under the kitchen module), and cut the floor around them. The spare tire access cutout sits in the same area, so the spare stays reachable.
Uneven floor. The Sienna floor slopes, and the outer seat rail tracks sit lower than the inner ones. I glued vinyl strips under the plywood to bridge the gap, so the rails now act like floor joists, and I designed the bed frame to compensate for the slope.
Anchoring and Foundation
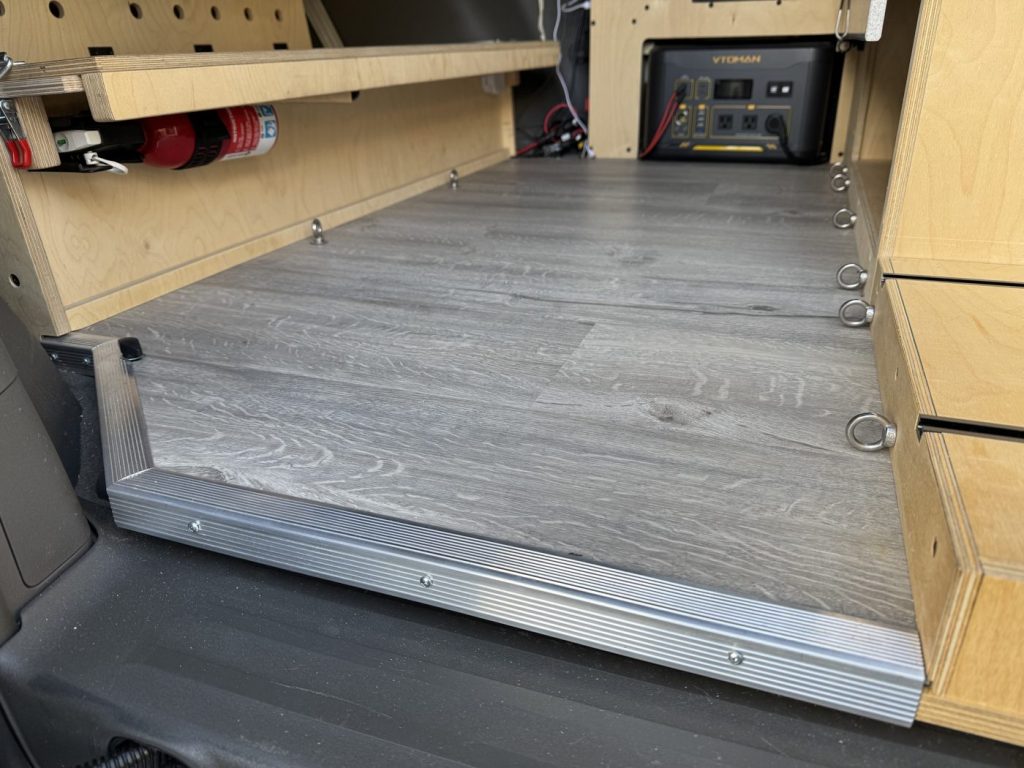
Under the seat rail covers are metal brackets. I fitted weld nuts into them and secured the floor with knob bolts at the front and eye bolts at the back, where the eye bolts double as cargo tie-downs. Steel angles, spaced 16″ apart, reinforce the areas weakened by cutouts and act as the base that the cabinet modules bolt to.
Why Vinyl Tiles?
Vinyl tiles are easy to clean and install, and I left them unglued so they can expand and contract with big temperature swings inside the van and be lifted for subfloor maintenance. Aluminum angles protect the edges and hide the expansion gap; the front and back gaps are covered by cabinet modules and the bed trim.
Quick Facts
- Vehicle: Toyota Sienna minivan
- Subfloor: plywood, cut from a tested template
- Fasteners: weld nuts, knob bolts, eye bolts, M6 rivet nuts
- Reinforcement: steel angles, 16″ spacing
- Top layer: unglued vinyl tiles with aluminum edge trim
Next up, Episode 3: The Bed. I cover the design challenges, bed, sofa and lounge modes, the tri-fold mattress, storage, trunk access and a detachable outdoor table.
← Episode 1: Design Concepts | Full build story | Episode 3: Bed →

