In 2023 I camped with a portable power station and 200 Watt folding solar panels, good for about 2-3 days. For my build I wanted 4-5 days of off-grid power, even without sun or driving, to support fully electric cooking. Here is an overview of the electrical module I built for my Toyota Sienna.
Why a Two-Battery Hybrid
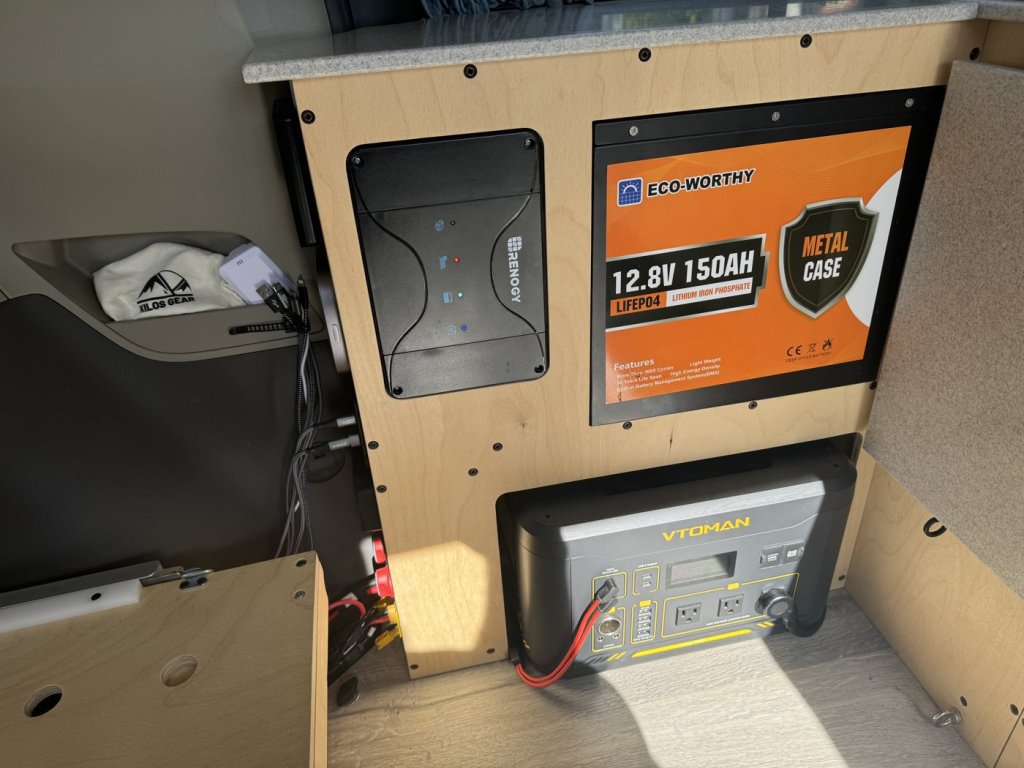
My power station shuts off when no draw is detected, which is a problem for appliances like the fridge. Taking it outside to recharge would also leave the van without power. So I added a dedicated main battery that runs the fridge and other essentials, with the power station working side by side. The station already has a built-in inverter (three 120 volt outlets, 1000 Watts, 2000 Watt surge), so I needed no separate one. It stays portable, and it recharges automatically from the main battery after powering cooking appliances.
Battery and Charger
Space was tight, so I chose an Eco-Worthy metal case battery: safe casing, 1920 Watt-hours in a small footprint, and an integrated handle. A cutout in the cabinet front gained half an inch of depth and more cooling surface, and a custom plywood harness holds it in place.
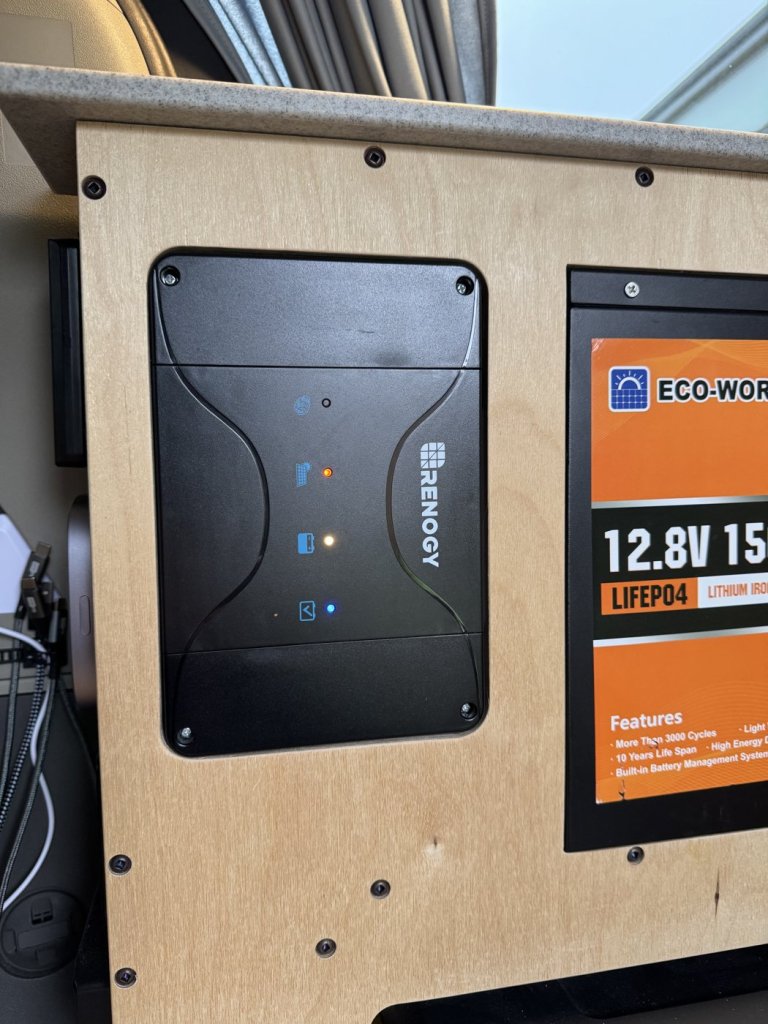
The Renogy DCC30S combines DC-DC and MPPT charging, so it accepts solar and alternator power. It can also charge the car starter battery once the main battery is full. I had to mount it vertically, so I added a 120 mm fan and built a removable frame that sits flush with the cabinet face.
Control Panel
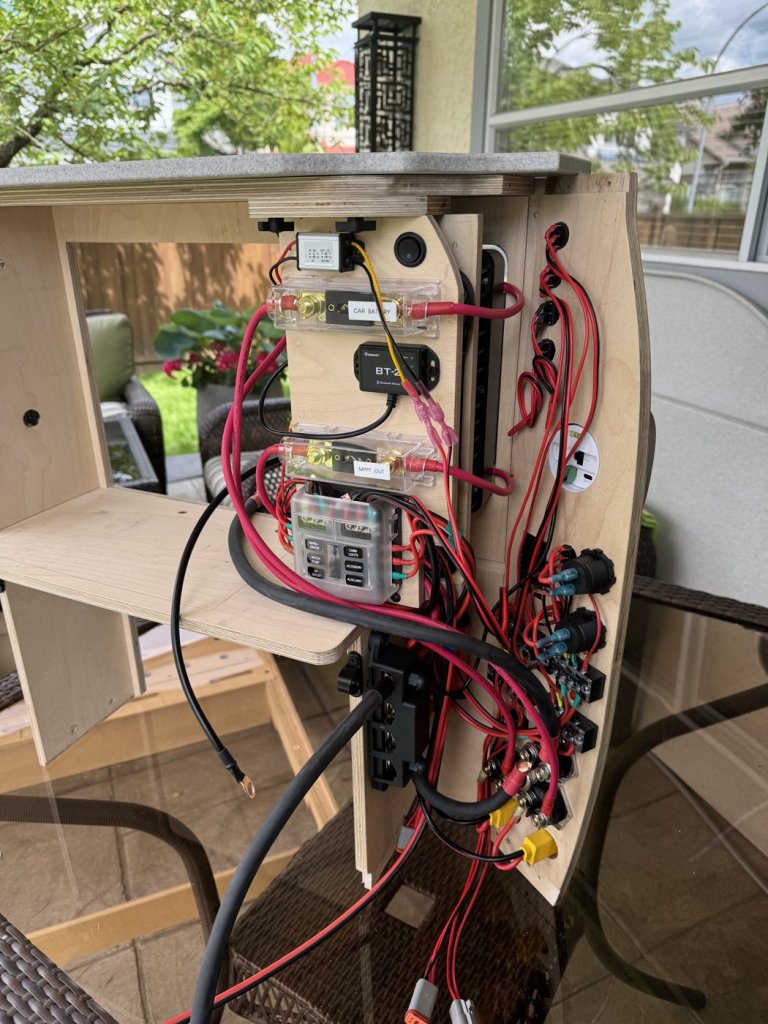
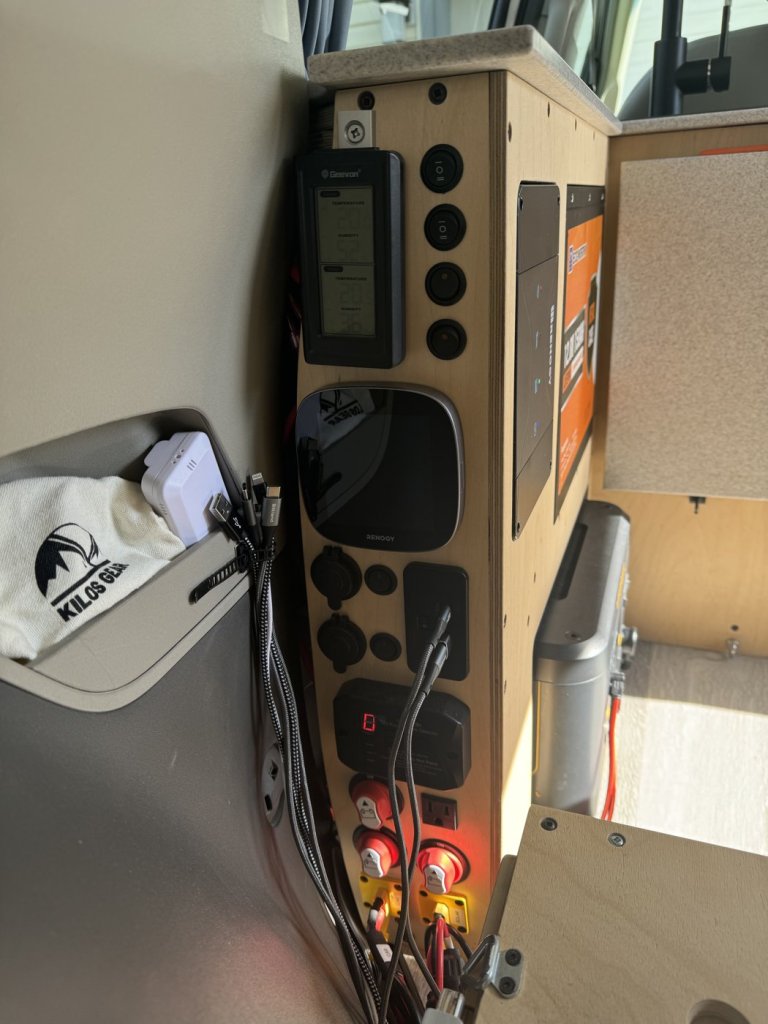
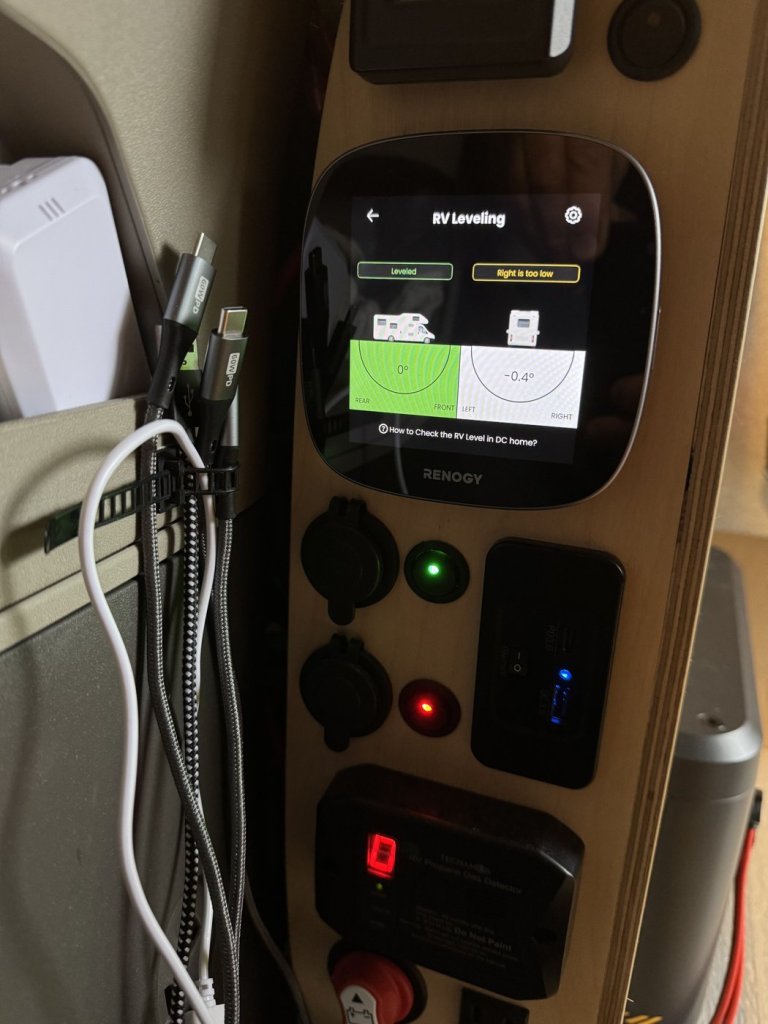
The side-wall control panel is cockpit-like: thermometer, light and fan switches, 12 Volt, USB-A and USB-C outlets, a propane detector for the cylinders I carry for my outdoor BBQ, and cut-off switches for the battery, solar and alternator. The Renogy One Core display monitors the charger, and its leveling feature lets me level the van from my phone while sitting in the driver’s seat.
Safe and Secure
The last thing you want is a power station becoming a projectile during emergency braking. The cabinet is fixed to the plywood floor with angles and bolted to the sink module, and the power station is held by a custom plywood locking mechanism with oversized latches. One tip: Deutsch DT connectors proved far more reliable than the automotive connectors I first bought.
Quick Facts
- Goal: 4-5 days of off-grid power
- Main battery: Eco-Worthy metal case, 1920 Watt-hours
- Charger: Renogy DCC30S (DC-DC + MPPT) with 120 mm cooling fan
- Power station inverter: 1000 Watts, 2000 Watt surge
- Display: Renogy One Core with RV leveling
- Connectors: Deutsch DT
Next up, Episode 8: Energy Sources. I cover my original solar setup, why I chose 400 Watt panels, panels on the crossbars, running solar cables, and charging on the run from the car alternator.
← Episode 6: Cooking & Storage | Full build story | Episode 8: Energy Sources →

